Canva is an online graphic design tool that helps you design creatives like social media posts, business cards, presentations, etc. The coolest thing about Canva is its ease-of-use functionality, which is why many of us love using it. Now, if we talk about animation, it is nothing but making elements like text, graphics, etc. move and make cool effects out of it. This not only helps to make it fun for your audience to watch, but also helps to explain things better.
Canva also offers animation, which makes it even more powerful to create some amazing content for your brand. In this blog post, we’re going to discuss about how to control animation sequence in Canva. Apart from Canva animation timing order, we’ll explore some different types of animation effects that Canva offers, and some valuable tips as well to create engaging animations in Canva.
Types of Animations in Canva
There are basically two types of animations in Canva:
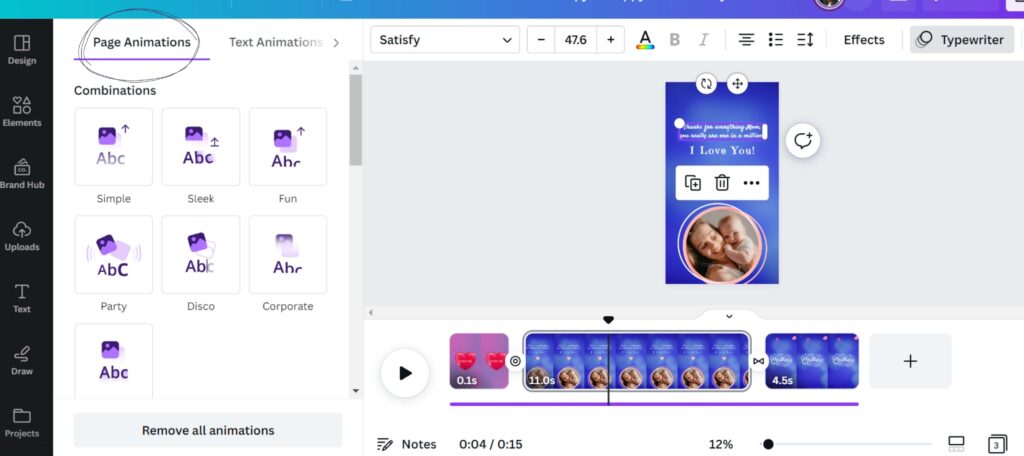
1. Page Animations
Animation effects that you can apply on a page level. We can find these effects in the ‘Page Animations’ tab under ‘Animate’ option as shown in the screenshot for your reference –
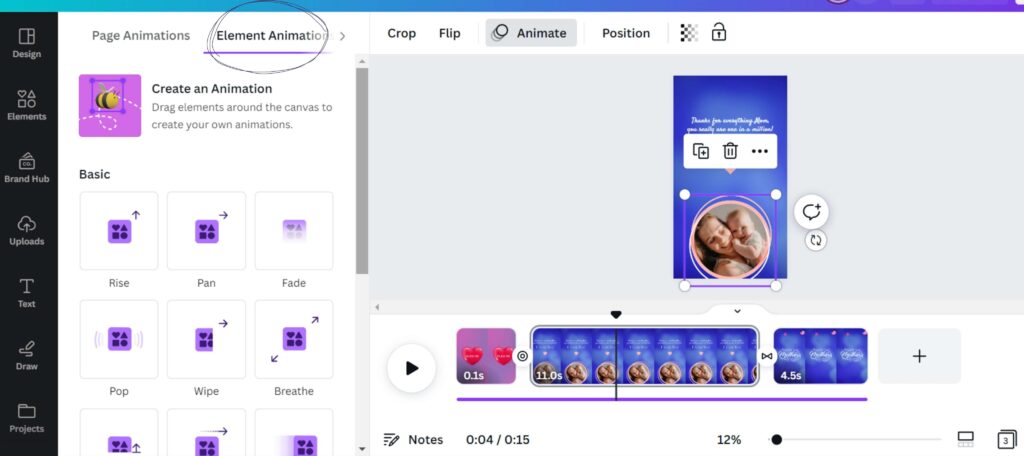
2. Element Animation
As the name suggests, element animation effect applies on the element level i.e. for text animation or any photo or graphic animation in Canva.
Canva recently release a new animation feature where you can create your own animations. You can refer to this post for detailed updates and a step-by-step guide to some amazing new Canva features.
How to Add Animation in Canva
Here’s a step-by-step guide on how you can add animation in Canva:
1. Click on the page or element that you would like to animate
2. Click on the ‘Animate’ option present on the toolbar above the editor. You’ll find some animation effects that you can apply to your page or element.
3. The first tab is ‘Page Animations’ and the second tab is ‘Element Animations’, ‘Photo Animations’, or ‘Text Animations’ depending on your selection.
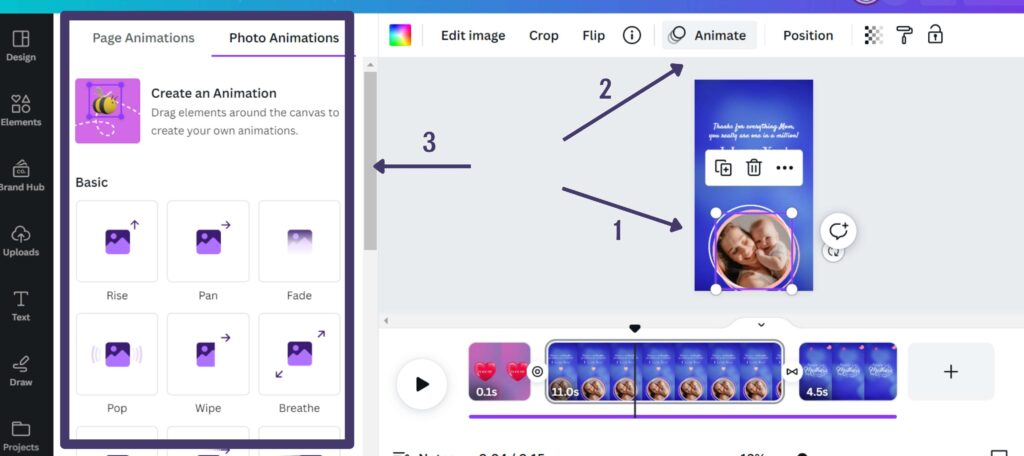
4. To preview any animation effect, just select the page or element and hover on the effect to see how it looks
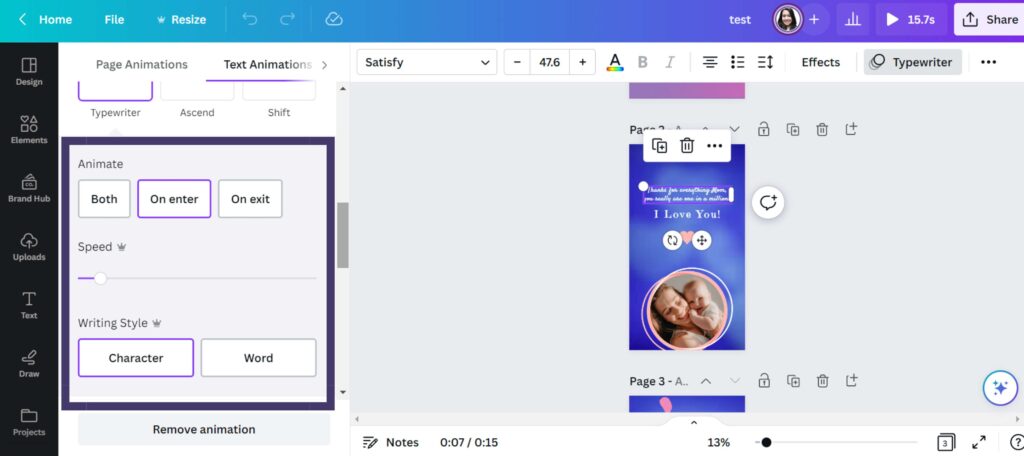
5. If you’re satisfied with the preview, select the animation effect you wish to apply and you’ll get more options to control your animation as shown in this image –
Explore these learning resources to elevate your Canva expertise:
Importance of Animation Time Order
Animation with well-executed timing and sequence can significantly improve its overall visual appeal and increase viewer engagement. The importance of animation time order can be understood through the following points:
- Communication: In animation, proper timing and sequence are critical for effectively communicating the story or message to the audience. Inadequate time order can lead to misunderstanding and misinterpretation of the intended message.
- Appeal: The appropriate timing and order of events within an animation can enhance its attractiveness and increase audience engagement. Doing so makes it possible to generate a feeling of expectation and enthusiasm, which can grab and retain the viewer’s interest.
- Emotion: With the right timing order, you can elicit the desired emotion in the viewer, whether it’s happiness, sadness, anger, or fear. For instance, the timing and sequence of animations can be used to create a comedic effect in the scene. Let’s say, if an animated character is about to slip on a banana peel, a delayed timing on the fall can create a humorous moment, as the viewer anticipates the inevitable slip.
How to Control Animation Sequence in Canva
I’ve seen so many of these questions asked like how do I control an animation sequence in Canva, how to change animation order in Canva, how to make elements appear one by one in Canva, how to delay text animation in Canva or how to make text appear one by one in Canva? Well, it is easy to achieve that in Canva.
Canva has a feature called ‘Show Timing’ that allows you to set/control animation sequence as per your needs. This feature, basically, allows you to adjust when you want your text and other elements to appear in your video design, and here’s how to how to change time of animation in Canva:
1. Create or open your video design document.
2. Select the element you wish to edit or hold ‘Shift’ and select multiple elements.
3. Right-click and select the option ‘Show Timing’. The element timeline will appear on the video timeline as shown here in this image.
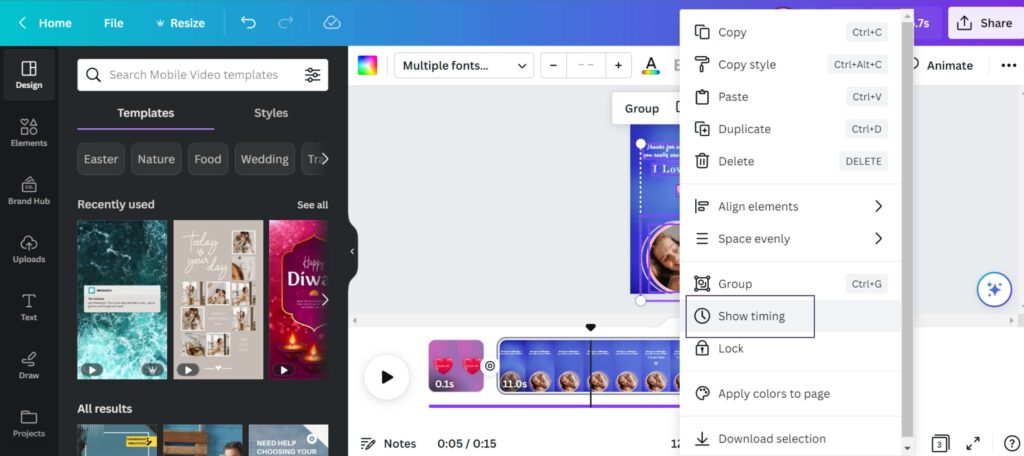
4. If you’ve selected multiple elements, you need to select this little arrow icon to show the timeline of all the elements you’ve selected.

5. Now, hover the cursor on the edges of the timeline, and you’ll see a bi-directional arrow that indicates that you can move the edge on either side.
6. Just, drag the handles of the timeline to adjust the timing and length of the element and set the sequence according to your needs.

This is how you can control the animation sequence in Canva. This implies to all the elements like text, graphics, or photos.
Note:
‘Show Timing’ feature is available for Video designs only.
Pro Tip:
For more realistic results, you can apply an animation effect first to the elements as shown in the previous section, and then set their animation sequence with this method.
To summarize, it is easier now to control the timing and length of the elements in your video using Canva. You can adjust the sequence of the graphics, text, or photos according to your needs to create better animations. I personally use this feature for my social media videos and when I design some e-cards/ video cards as well. Another tip is that you can also sync the music beat timing with the element appearance to add a more dynamic feel to it. Hope this article was helpful. Do let me know in the comments!
Must Read:
2 Comments
Thanks a lot for this nice blog post it was useful
My pleasure!