Looking to upgrade the quality of your videos and make a mark on YouTube? Well, you’re at the right place! In this guide, we’ll talk about how to record high quality audio and video for YouTube, but before that let’s understand why it is important to upgrade your video quality and how it can impact your YouTube channel.
Table of Contents
ToggleImportance of High-Quality Video for YouTube
Gone are the days when only the content ruled the YouTube kingdom. Today, pairing your creative ideas with top-notch quality is the key to making a lasting impact. It’s not just about appearances – focusing on quality alongside your content transforms how viewers engage with your videos. Here’s a quick rundown of why upgrading the quality is the best thing you can do for your YouTube channel:
- High-quality videos help you build trust and credibility with the viewers.
- This is a no-brainer, but it helps your videos and your channel to stand out from the crowd.
- High-quality video and audio help keep viewers hooked, thereby increasing the watch time of your channel.
How To Record High Quality Audio and Video for YouTube
Here is a short roadmap to help you upgrade your audio and video quality and elevate your YouTube presence:
1. Know Your Target Audience
To make awesome videos, know who’s watching! Understand your audience – like how old they are, the demographics, and what they want. This helps you create content they’ll love.
Plus, when you know your audience well, you can pick the right camera and microphone that match what they enjoy. If they’re into clear and cinematic videos, you might need a cool camera. If they love hearing you talk, a good microphone is key. Knowing your audience is like having a secret recipe for making your videos look and sound amazing!
2. Choose The Right Equipment
Now, after you have your target audience and the type of content you want to create in mind, it is important to choose your tools to make the best content reach your target audience in the best way possible. Yes, I’m talking about the equipment here!

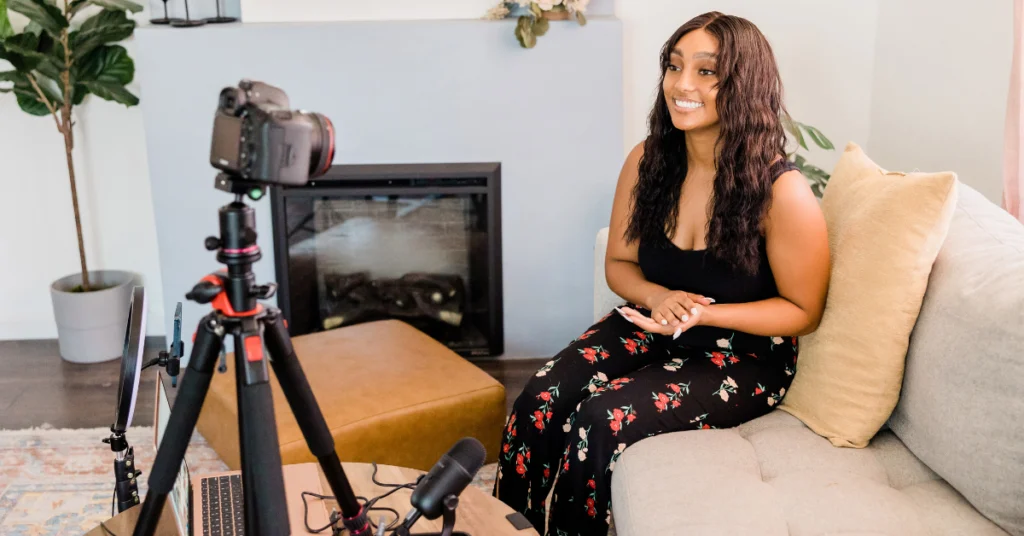
The two basic things needed to record high-quality audio and video are the microphone and the camera. And, of course, the right kind of lighting and background setup makes it even better. Here are some tips to select your ideal gear based on the type of content you want to create:
Camera Selection
- Start with a good-quality camera. Consider DSLRs, mirrorless cameras, or high-end smartphones with advanced camera capabilities depending on your budget.
- When choosing a camera, it is important to consider the type of videos you are looking to create. For example, for vlogs, you might want to consider a camera that is preferably lightweight like Insta 360 X3, DJI Pocket 3, or a GoPro Hero 12.
- Look for features like high resolution (at least 1080p or 4K), good low-light performance, and the ability to shoot at higher frame rates for smoother footage.
- If you’re a beginner in this field, highly suggest you to learn the camera basics first for Videos before investing in any equipment.
Top Picks for YouTube Content Creators:
Bonus Tip: If you’re a beginner and don’t want to spend so much on the camera, then you can also invest in a good camera phone for making videos. Check out some of the best camera phones for content creators that can help you level up your video quality without burning a hole in your pocket.
Microphone Selection
- Many people make the mistake of avoiding this and using the built-in microphone in their camera or phone. However, investing in a quality microphone helps you capture clear audio, making your videos more engaging to watch.
- It is important to select a microphone type that suits your recording environment and content style. For example, Lavalier mics offer mobility, shotgun mics are ideal for directional audio, and USB microphones are convenient for controlled environments.
- Additionally, decide between XLR and USB connectivity based on your setup and preference.
Top Picks for YouTube Content Creators:
- Blue Yeti USB Microphone
- Wireless Lavalier Microphone
- Boya By-M1 Pro II Lavalier Microphone
- Rode Auxiliary Videomic
- Rode VideoMicro II Ultra-compact
Tripods and Stabilization
- Use a sturdy tripod to keep your camera safe and stable. This is crucial for avoiding shaky footage and maintaining a professional look.
- Consider additional stabilization tools such as gimbals or steadicams for smoother and more professional-looking videos, especially if you plan on recording dynamic shots for your videos.
Lighting Equipment
- Proper lighting is key to achieving a polished look. Natural light is great, but investing in studio lights or softboxes can provide consistent and controlled lighting conditions.
- Pay attention to the color temperature of your lights to avoid color discrepancies in your videos.
Background Setup
- Create an appealing backdrop for your videos. This doesn’t necessarily mean an elaborate set; even a neatly arranged and well-lit space can enhance the overall visual appeal.
- Ensure that your backdrop complements your content and doesn’t distract viewers.
3. Choose The Right Location
A suitable location enhances the content quality, making videos more engaging for your viewers. So, always opt for quiet spaces, minimize background noise, and ensure good lighting.
As mentioned above, you can use natural lighting to your advantage, but if that is not possible, investing in a basic lighting setup can also do wonders in improving your overall video quality.
Bonus Tip: If it’s difficult to get a quiet space, you can use acoustic foam panels on your walls where you record your YouTube videos. These foam panels help reduce and absorb unwanted noise and echo for better sound quality.
4. Learn Basic Camera Settings
Knowing how to adjust your camera settings is super important for making your YouTube videos look awesome. It helps you capture clear and well-lit footage, making your content more professional and interesting.
You can learn these skills from YouTube tutorials, photography courses, or just by playing around with your camera. The more you practice, the more confident you’ll become, and soon you’ll be creating top-notch videos for your YouTube viewers.
Here’s an AMAZING course by an expert in this field that you can opt for –
Learn Camera Basics for Videos – A Beginners Guide
5. Audio and Video Editing
There’s no use of fancy gadgets if we don’t edit and present our videos well. Audio and video editing is the final touch that transforms your raw footage into a polished and engaging YouTube video. Here’s a basic overview:
Audio Editing
Editing your audio is really important for delivering clear and professional sound in your videos. It also helps to keep your audience engaged, thereby increasing the watchtime of your videos. Consider these basic steps:
- Trimming and Cutting
Remove any unnecessary parts and ensure a smooth flow by trimming and cutting your audio clips.
- Adjusting Levels
Balance the volume levels to prevent abrupt loud or soft sections. This ensures a consistent and pleasant listening experience for your audience.
- Adding Music or Sound Effects
Enhance your video by incorporating background music or relevant sound effects. However, be mindful of the balance to avoid overpowering your voice.
- Eliminating Background Noise
Use noise reduction tools to eliminate any unwanted background noise, contributing to a cleaner and more professional audio track.
Video Editing
Video editing enhances the visual appeal of your content. Here are some of the basic steps:
- Cutting and Arranging Clips
Trim and arrange your video clips to create a cohesive and engaging narrative. Remove unnecessary footage to maintain viewers’ interest.
- Adding Transitions
Smoothly transition between scenes with fades, cuts, or other effects. This helps create a professional and polished look for your video.
Note: Don’t overdo it!
- Color Correction and Grading
Adjust the color balance, brightness, and contrast to achieve a consistent and visually pleasing look throughout your video. Color correction enhances the overall quality.
- Text and Graphics
Incorporate text overlays, graphics, or subtitles to convey information and engage your audience. Ensure these elements complement your content without being distracting.
- Exporting and Finalizing
Once satisfied with your edits, export the video in a suitable format and resolution for YouTube. Ensure the final product meets the platform’s guidelines for optimal viewing.
Bonus Tip: In case you find the editing task complex or time-consuming, consider outsourcing your editing tasks to freelance video editors for added convenience and professional results. This allows you to save your time and focus on content creation while benefiting from specialized skills without extensive editing knowledge.
Final Words
Nowadays, YouTube is more like a battleground for some amazing content creators plus due to the short attention span of the viewers, it is really important to stand out with your content and the quality of your videos. Hope these tips help you to better the quality of your videos on YouTube and stand out from the crowd.


